This post will be a quick tutorial on importing your sick terrain from World Creator 2 into your Blender project. I’ve done this a few times so far, including in my most recent post. Now I’ll walk you through the process of exporting and importing the surface layer - not including textures (future post).
World Creator
- Make something dope!
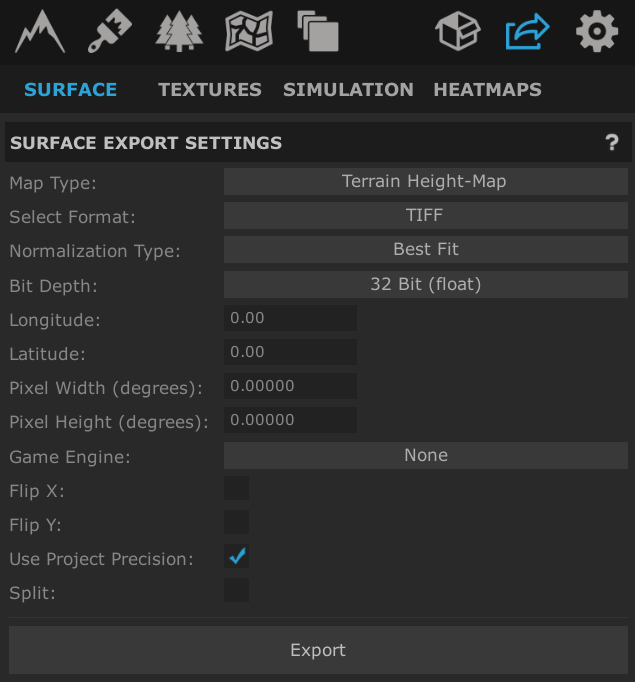
- Go to Export in the top-right corner, make sure you’re on the Surface tab and set the following settings:
- Map Type: Terrain Height-Map.
- Select Format: TIFF.
- Bit Depth: 32 Bit (float).
- Export and save
heightmap.tifin the folder for your render.
Blender
- Create a flat plane.
- Go to edit mode.
- Set select mode to Face Select.
- Right click plane and select Subdivide.
- Set number of cuts to 10.
- Press ‘A’ to select all of the subdivided plane.
- Right click and Subdivide again.
- Set number of cuts to 10.
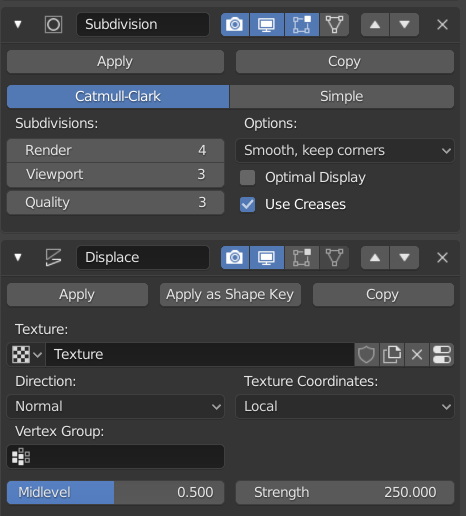
- Add “Subdivision Surface” modifier to plane.
- Set to Simple, with subdivisions to 4 (Render) and 3 (Viewport).
- Add Displacement modifer, set the texture to
heightmap.tiffrom before. - Set the Strength to ~1/4 of the height range of the World Creator file.
- Scale the plane to half the size of the World Creator map.
At this point you should have a pretty solid terrain to work with. I’ll do a follow up post soon for how to work with textures, but if you’re doing something like a desert you can probably just straight up add a sand texture as it is. Don’t forget to use a mapping node to scale it multiple times!